|
|
|
||||||||
|
|
|
||||||||
Lil' Greenee - 1973 RWA MG Midget |
||||||
| Greenee's Home | Engine | Interior | Trunk | Suspension | 100's of MG Links | |
| Electrical shelf | Exterior | Interior2 | Carbs | Item replaced | Spridget specific Links | |
MG Midget Engine and Drive train
The first four photos loading, while you're reading
this, are the before and after shots, up to the same
level of re-assembly.The next two shots... have everything back in.
The rest of the page is the sequence and close-ups
of all the processes to go from one to the other.
Photo colors vary due to day/night lighting in the various photos
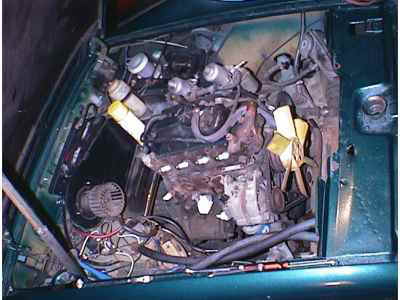
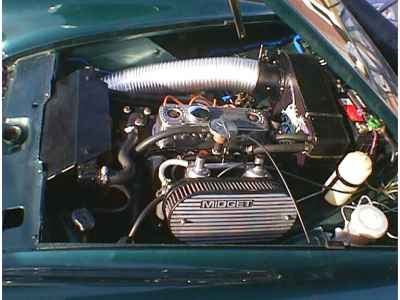
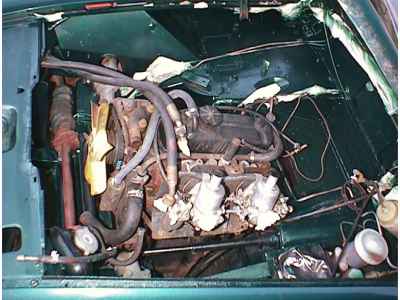
Passenger Side View
|
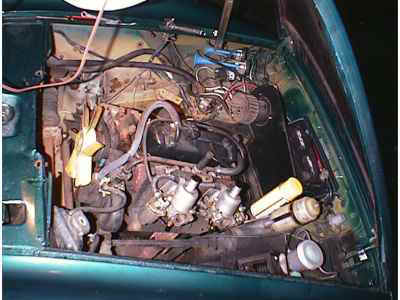
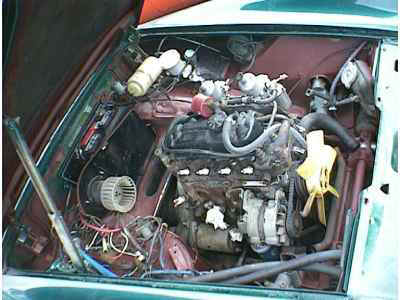
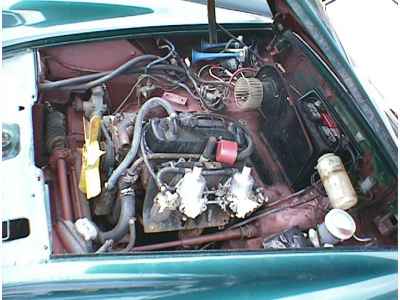
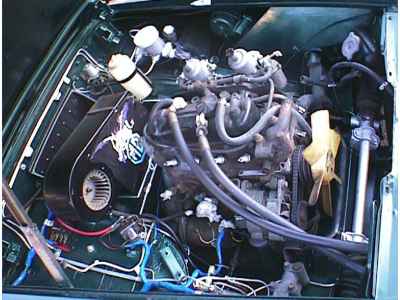
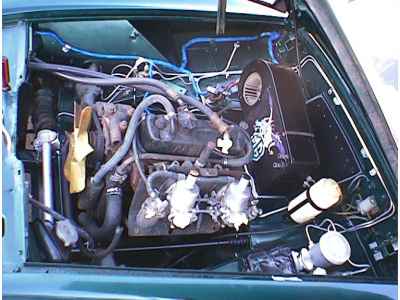
Driver's Side Views
|
|
|
 |
 |
| The rest
of the photos on this page, |
|
|
Well it all looks relatively |
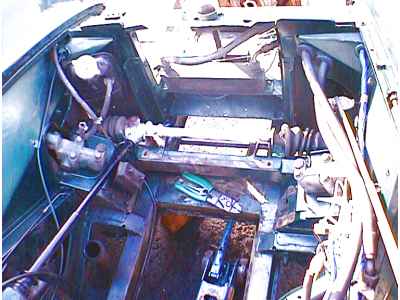
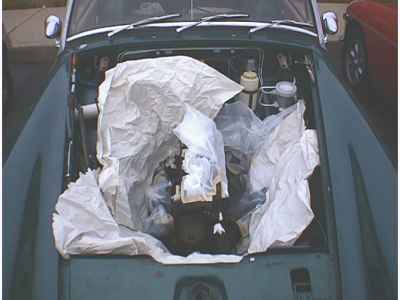
Just after disconnecting everything from the engine, getting it ready to pull. I like to plug all holes with rags to keep bugs, bouncing nuts and washers (when I drop stuff) and other such matter out. Look at the way the P.O.'s had rigged the breather. They plumbed the timing chain cover oil separator hose straight up to the valve cover breather pipe! Useless! |
|
 |
 |
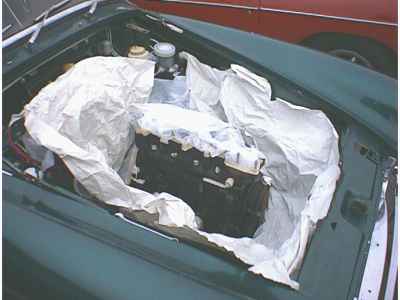
Where I'm working on this one, I can't leave the motor sitting outside the car. So everything was had to be done in place. I had to lift everything area by area, sand it, red primer it in place. A pain, but it turned out fine. |
|
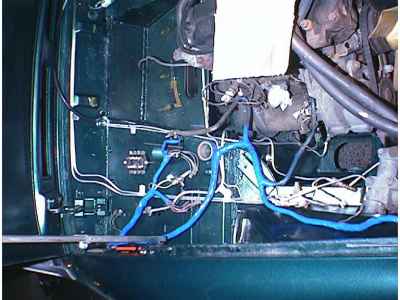 After rubber coating the battery area it was painted green, the pipes silver, and the harness re-wrapped. |
 black battery area is rubberized undercoating |
All the electrics were stripped out, pipes prep'ed and the wiring harness re-wrapped. After pulling the remainder of the heater box, I red primered, then coated the battery area with rubberized undercoating. Once dried, a green coat was added before the plastic battery box went back in. |
|
 |
 |
With the brake pipes clean up, the electrical harness was re-wrapped, and
the newly painted (and custom emblemed) heater box was put back in. The steering
rack was cleaned up and repainted. Now... were ready to pull that engine...if I ever get a
moment or two... |
|
|
|
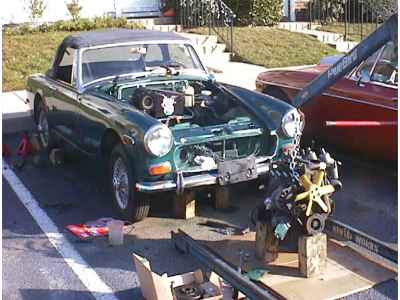
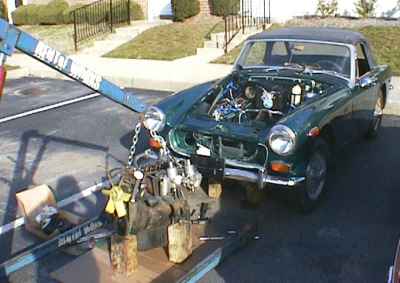
Finally out. You wouldn't believe it, but the 'cherry-picker' was transported to and from
my work location in the back of my 1973 MG BGT. I can even close and lock it.
That's a full 5 foot tall 4 ton lift. (broken down of course!) |
|
|
|
| Before
I pulled the engine to fix the clutch, I had bought everything you could unbolt
inside the bell housing just in case. I ended up only really needing to replace the
standard items. The Carbon donut throwout bearing with new clips, pressure plate and
clutch disk. I even had a new fork to put in but the old one and it's bushing were in very
good shape. I had ordered a new pilot bushing as well, but it figures....leave it to the
big catalog companies (VB!) to send me the wrong one! So, the orig., which looked to be in
good shape, went back in. Tech Tip: To remove the pilot bushing ... take a long thin screw that has a sharp edge under the lip of the head. Lay it in the bearing so the head hooks on the back lip (inside lip) now take a single larger diameter bolt that will make up the difference in the inside diameter of the bushing. I used a pair of pliers to hold on to the bolt threads, and a claw hammer, like pulling a nail to pull the pliers. It popped right out very smoothly.
|
|
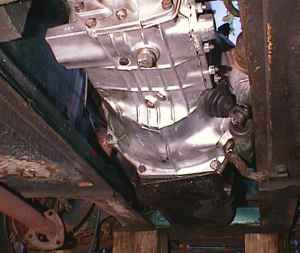 nice tight clean rebuilt tranny |
Well after sticking the motor back in I finally proved
to myself that the tranny was bad. Both first AND second gear were non
existent. Yep...yep... I had to pull it all out again! This time the motor and tranny were pulled together. So, thanks to Ted Schmacher of TSI Imports, I have a very nice rebuilt tranny. This unit has the front plate machined to accept a full fledged oil seal. Definitely worth the money spent now so I don't have to worry about oil leaks later. They say you have to disconnect the driveshaft at the rear to get the front driveshaft end re-connected when putting the motor and tranny back in. I must have gotten lucky. I used a bungy cord in the shift lever hole to hold the driveshaft up. As I worked the engine and tranny into place, I guided the shaft in. It slipped right in by turning the crank a little as I slid the motor in.to get |
|
Well the head had to
come off. There was a lot of water in the oil and almost no water in the
radiator. Compression was good, as roughly 160-165 psi (dry) on all four cylinders. While
it was apart I or course, went ahead and removed all traces of carbon deposits on the
piston crowns and within the cylinder head areas. After a lot of cleaning and surface prep, I plugged all water and oil passages on top the block and in the head, taped off the cylinders and combustion chamber areas, and sealed up all the piping. I sprayed the head, the block top, and both sides of the gasket with a spray on copper sealant from Permatex. Torqued everything up and viola! I let it sit two days before checking the torque settings. From what I could tell, none had changed more than 3-5 ft/lbs. They were all re-torqued to spec. just to be safe. |
**** Very few pictures were taken throughout the head removal and torquing. My hands stayed too grimy to mess with the camera and I was in a hurry that day. sorry.....****** A valve adjustment after the torque down, either suggests the gasket is thicker (bummer...lowering compression...155-160 across the board) and/or the previous readings and adjustments were simply way out. |
|
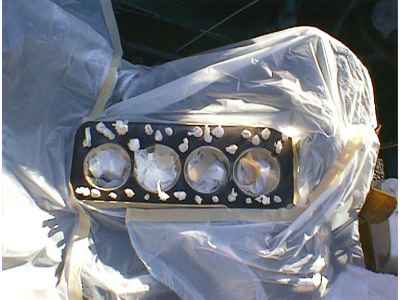
 With the engine bay all masked off getting ready for a new paint job. |
 Everything black turned red, everything white is masking |
| The entire engine bay was masked off and the engine painted in place. The white, is painters edging (plastic sheeting in a roll with masking tape attached on one edge.) used to cover the nice clean valves and rockers and intake mating area. I had to wait for a warmer day before painting. | |
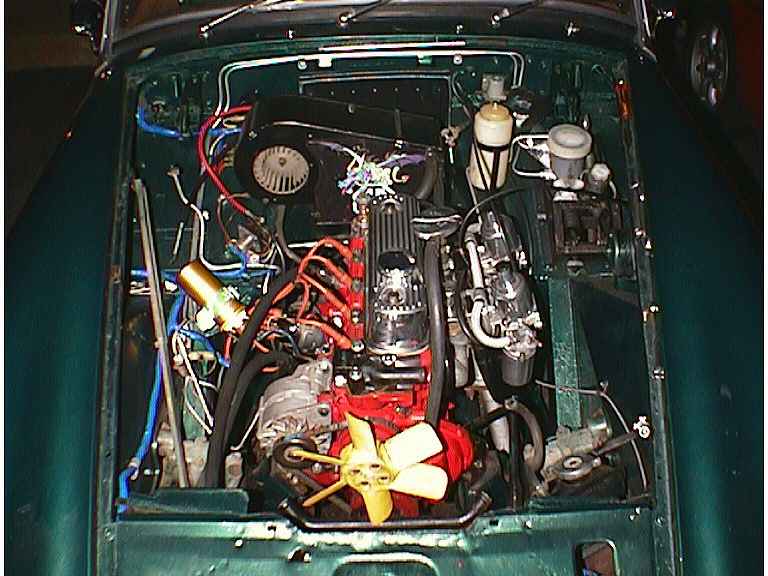
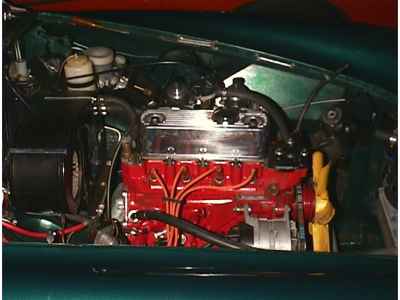
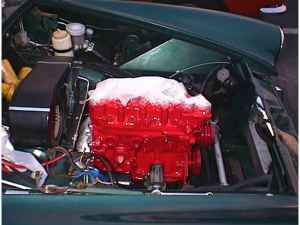 Now that's a shiny red engine |
 It was painted with Plasti-Kote 500°C Universal Red paint |
| In these shots the engine is still wet. Plasti-kote Universal Red 500°C engine paint was used. Three very thin coats were used. The third coat is still wet in these photos. | |
 |
 |
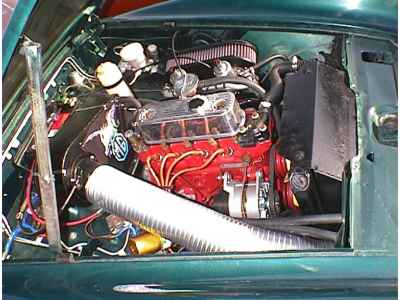
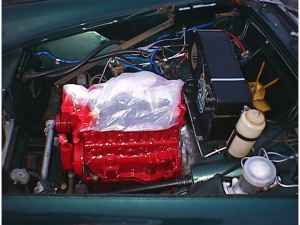
| With all the ancillaries
back on...it truly is an impressive looking little engine. Now for the radiator
and a test drive. You'll also notice the brand new PCV valve and correct
associated plumbing (compared to the P.O.'s setup as can be seen in the first few
photos on this page). The crank case is registering about 3-7psi of vacuum (via
a gauge tap in the side plate of the engine) with the engine running at idle. This
should keep the oil in the crank where it belongs and not leaking out past the rear crank
journal.
|
|
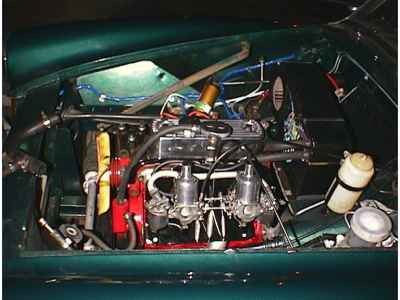
Well there she is. In all her splendor. Only the radiator and air boxes need to go back
in. It took only a minute or two to tweak the idle stops and sync the carbs. I blipped the throttle by hand a few times, and she freely rev's and drops right back to idle quickly. I can't believe I had put the distributor back in, and a guess at best it was sitting at roughly 9°BTDC. With no bonnet, we immediately jump in and took her for a quick buzz around the neighborhood. A subsequent tune up and compression test, shows I was right. the thicker head gasket had dropped the compression down about 5-8 psi across the board. Best part is, I should be able to pump the crummiest gas I can find through her without any problems. |
|
|
|
| At first I had an accordion plastic air vent duct pipe. This nice silver metal one is a flexible 4" I.D. house vent pipe. It fists BEAUTIFULLY! If it were stretched out it would be 8 foot long. With all the pleats in it fully collapsed, it fits great. The metal will take a set in position as you bend it to radius turns. It slipped right on to the heater box and even the front valence panel opening. I only used a 5" hose clamp up one end, up front at the valence panel. Compressing the pleats together (tighter) on the air box neck made it a nice snug, air tight fit. These shots also show the new alternator installed. Yes, the original one had a bad diode pack in it. I went ahead and picked another new one, so now I have one for spare parts. (The MGB';s Spits, Midgets, etc, all use the same series of alternators over the years.) | |
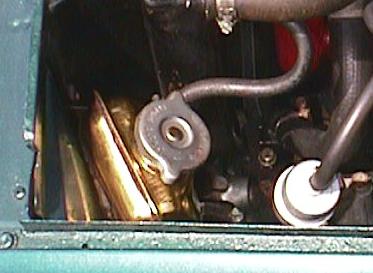 |
I recently planned to repaint the overflow tank, but on cleaning it up I realized it was solid brass. So a quick polish job, and a coat of clear 500° engine paint and she'll stay... shiny. :-) |
| ...stay tuned...more to come.... | |
|
last edited 12/06/09 |
|