|
|
|
||||||||
|
|
|
||||||||
Whitey - 1975 Spitfire Specific Tasks and Procedures |
||||||
|
||||||
|
Considering the price (and lack of simple availability in the U.S.) I decided to go ahead and build my own heat shields for the dual HS4 SU carb setup on this Spitfire. I'm a 'cut-to-fit' kinda' guy. So my design came from a chunk of cardboard and a pair of scissors, whittling a simple shield I could retro-fit. After looking at the design of a few of the 'stock' style shields, I settled for the following design for the following reasons.
|
| I didn't want to have to try and accurately measure, let
alone cut out, a sheet of metal to span the manifold openings and bolt patterns. Therefore
I figured a two piece design would solve the problem of center to center dimensions and
allow spring clearance for the main throttle cable return. The blue outline in the above
picture, is the heat shield. The red, being the manifold and bolt pattern.
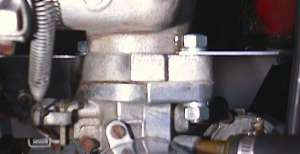
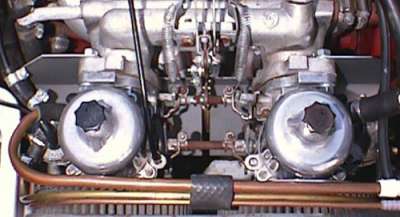
I bolted it on from behind the manifold flange. That way I didn't have to match up the throats of the carbs or mess with extra gaskets in between the carbs and manifold. I took 2" long, 5/16"-18 tpi bolts, cut the heads off, and threaded them through the manifold flange to replace the original studs, but sticking out the rear as well. The carb heat shield, wraps around the neck of the manifold, and is attached with two nuts, just like the carbs on the front side. |
 A view of the rear of the heat shield viewed from the front at manifold level. |
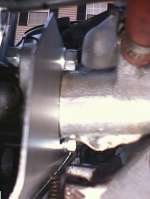
 And a shot from the top showing the rear carb top ear mount and bolt.
|
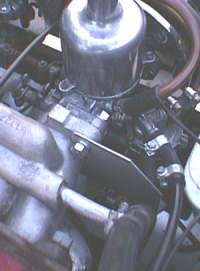
 A full shot from the top, showing both heat shields in place and the center spring clearance A major advantage of this mount design, means I can remove the shield as needed without disturbing the carbs. I'm thinking of adding a bit of insulation to the back side (TBD) Now for the real logistics. The aluminum sheet used for the shields is literally the top of and electronics equipment box I had laying around. Any baking cookie sheet would do as well. Start with a pair of scissors and a piece of thin cardboard. Simply cut to your desired fit and shape. Trace your cardboard onto the sheet metal. Using a pair of metal shears, or jigsaw, or what ever means you have, simply cut out the shape as desired. Use a standard gasket to mark where you need to drill your two holes for the mount bolts. You could also simply mark them right through the manifold stud holes while test fitting your cardboard templates. After bolting them up, bend as desired to clear the manifold and add a bit of protection to the bottoms of the carbs and to get the shield 'centered' between the exhaust manifold and the bottom of the carbs. (best position to minimize absorption of heat from the exhaust manifold and still minimize radiation to the carbs.) Best of luck with what ever you try!
|
©1987-2010
All material copyright© Teglerizer 1996-2008last edited
3/15/08

hits since last reset