|
|
|
||||||||
|
|
|
||||||||
Whitey - 1975 Spitfire Specific Tasks and Procedures |
||||||
|
||||||
|
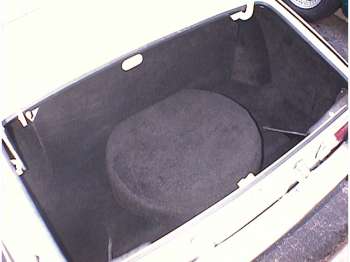
| Using inexpensive carpet from a local Pep Boys (east coast chain auto parts store) I decided to carpet Whitey's trunk. Why? Why not! Well actually, I wanted to insulate the trunk because it gets warm in there from the muffler right underneath, and I figured the carpet would quite down all the rattles from stuff rolling around in the trunk while driving spiritedly. |
|
| I used a piece of 3/8" thick
insulation that has the foil on one side designed for engine compartment insulation. This
works well as a sub pad under the carpet and helped to smooth out the contours of the
trunk floor. I cut a piece of carpet 2' 4" wide by 3' 10" wide. I glued an equal
size piece of the insulation to the back using 3M spray on glue. I fitted test fitted the carpet, estimating the center, and marked where the tire spare tire mount bolt stuck up. Using a razor blade, I cut an H shape in the middle of the bolt location. After pressing the carpet down over the mount, I folded the middles of the H back under the mount to hold it in place. One extra 1' x 2' piece of carpet was laid up into the opening where the spare tire meets the gas tank.
|
|
 |
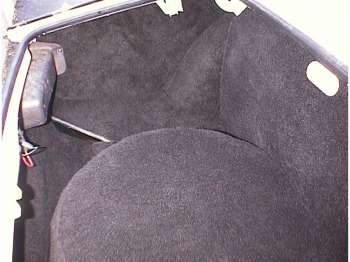
Here you can see the folded back carpet and the insulation. I ran it all the way up the back under the taillghts to the metal lip that is part of the body work. This left the edge of the carpet flush up the back wall. |
|
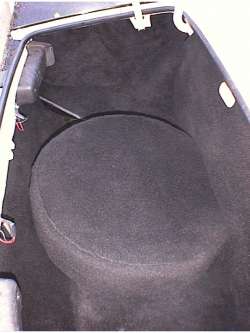
| The wheel arches are the only place the carpet
is glued down. I trimmed to fit, very easily with a razor blade. Leave extra that will lay
on the floor. Simply cut multiple slices in it to create 'tabs' that will cover the joint.
These tabs from the wheel arch covers will be covered by the main floor carpet, thus
hiding the seams. With scissors in hand, I kept trimming a cardboard template to make a pattern for the side panels. The panel does not need to fit perfectly. When I covered the panel with carpet, the edges of the carpet overhang the edges to flexibly fill in the gaps of the side panel edges where it meets the opposing surfaces. The gas tank panel was very straight forward. Just spray on glue, lay carpet on it, and trim to fit. For the tire cover I first wrapped a piece of carpet around the circumference of the tire (glued or course) roughly 30% taller than the width of the tire. Working my around the tire, I carefully cut slots down from the top to the edge of the tire where it started to curve over to the to surface. I glued and folded down every other 'tab'. Then going back, trimmed every other tab to fit down between the 'square' previously folded down tabs. I then simply glued a round piece on top. The 'fuzz' of the carpet makes it easy to take a dinner table fork and 'rake' the carpet a bit to somewhat hide, or smooth out the seams. |
|
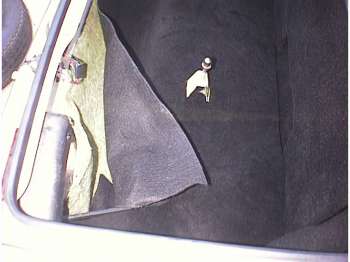
| Most definitely, the hardest part of this job was the rear bumper supports (seen in the above photo as a black shiny line at 11 o'clock on the tire) I simply painted the originally white metal work, black. Using a razor blade, I cut the carpet along the support. Laid the carpet in and tucked it down on all sides. The large bottom carpet piece does lay down into the 'trough' below the back of the tire. I simply tucked one extra piece of carpet under the edge of each support, again just to hide the white metal work. |
![]()