|
|
|
||||||||
|
|
|
||||||||
|
| Ever had a problem with the interlock switch on your O/D
tranny? Good luck getting to it from underneath! On a late model full synchro tranny, the switch is mounted at about 10 o'clock on the top of the tranny right next to the tunnel. There is no way for a person, even with tiny hands, to reach up there and even connect/disconnect the wires, let alone replace the interlock switch itself. You have to lower the tranny to even consider touching it. So I cheated. I lifted the carpet on the tunnel from inside the passenger compartment and added an access panel right through the tunnel to get at it. |
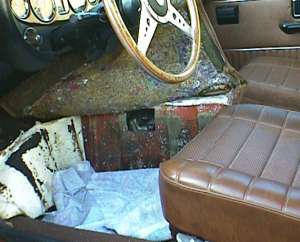
With the carpet lifted, and the heat insulation
pulled away from the tunnel (white stuff in photo)
and a towel on the floor to collect the metal filings
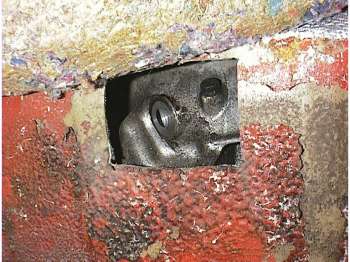
Old switch exposed after panel cutout
| The first trick was finding out where to cut the panel out.
After 'guesstimating' and judging with a ruler, I drilled an 1/8" hole trough the
tunnel. With a bright light shining through the hole from the passenger compartment, from
underneath the car I was able to see where the hole was in relation to the switch. I then
adjusted my position and drilled four holes at the corners of where I wanted the panel. I
used a Dremel rotary tools with a cut-off wheel to cut out the panel between the four
holes. DO NOT USE A JIGSAW! There isn't enough clearance behind the tunnel wall for
the blade to not damage something back there. It's relatively soft metal and
surprisingly easy to cut.
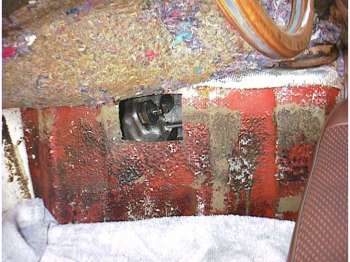
A soft metal panel (sold as a body work patch panel from Pep Boys) was used to make a 'door' for the hatch. I cut out a piece about 1" larger than the opening I cut in the tunnel. I then simply bent it a bit to form fit the tunnnel. I attached the original metal section I had cut from the tunnel, to the back of the new hatch plate. This acts as an easy alignment guage. I laid down a bead of trim adhesive (yellow gorilla snot) on the back of the panel around the door to water proof everything and attached the new 'door' in place with four interior upholstery trim screws at the corners of the new panel. |
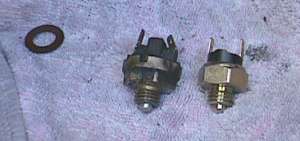
This picture is just for a reference of the variations
that exist in the old OEM and new switches available
these days. The new switches work fine. Just remember
to test the switch actuation before buttoning everything
up. The fiber washers are used to set the
actuation point. Stack a few if needed, or use none
at all. What ever works for your particular installation.
|
last edited 12/06/09 |
accesses to date |