|
|
|
||||||||
|
|
|
||||||||
|
Tube Shock conversion
| Well there has been a lot of
talk on the MG listserv and on many of the webs about a tube shock conversion using the
Dodge Colt shocks. Well you've finally found some pictures and comments about the real
benefits or changes you might expect. Detailed information and process descriptions can be found on Skye Poier's tech page as well as his updated page. More info can also be found on British Automotive's Tech Section page. All these pages contain the details of this conversion. This site is strictly photos of my conversion and the effects on handling I have noticed. If you convert, you do so at your own risk. For reference the shocks I used were Gabriel
Pro-Ryder heavy duty gas shocks from Pep Boys, (PB's part number 73626). They
collapse to 10.25" and extend to 16.1". This installation was on a Chrome bumper
1973 MGB GT. The original ride height as measured from the center of the wheel to the
chrome body trim stripe was 13.5" +/- .1" all the way around the car. |
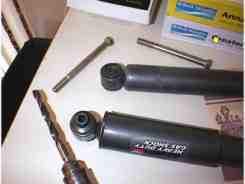
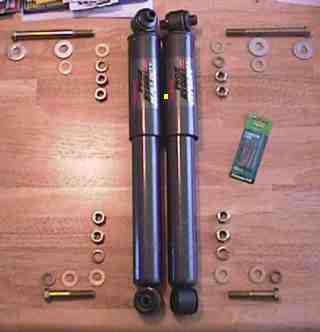 complete kit of parts
|
Well here's all the components you need. 2 - Gabriel Pro-Ryder Gas Shocks. 2 - 5-1/2" grade 8 7/16" diameter fine thread bolts 2 - 2-1/2" grade 8 7/16" diameter bolts 6 - fender washers 4 - lock washers 4 - nylock or castle nuts. My modifications to the list: |
| I got lucky. My car ramps were just the perfect size to place under
the front leaf spring mount points, almost letting the car sit at its normal ride
height without the wheels in place. I then use a floor jack under the differential to
raise/lower the axle as needed. A scissors jack is used under the edge of the leaf spring
while undoing the u-bolts.
|
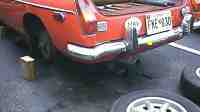 back of car nearly level on stands  car ramp under front edge of spring mount |
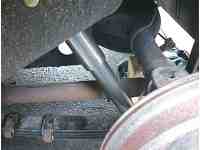
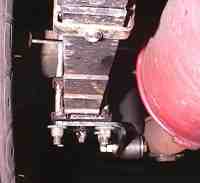
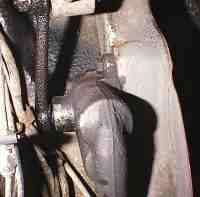 leaky original shock - passenger side |
Looking straight up at the passenger side shock from underneath. The
oil covered lever arm is pointing towards the top of the photo on the left. You can see
the rear most (relative to the chassis) shock mounting bolt at the top of edge of
the shock body.(middle of the photo) The fuel lines and wires pass by the shock at the
left of the photo. Your stock fuel pump would be just out of the photo at the bottom. |
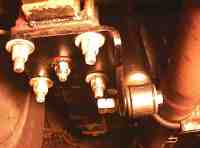
| Looking at the passenger side U-bolts that hold the leaf spring to the axle and the lower shock mount plate and 'dumbbell' connecting arm. You can see the blue colored floor jack to the right, under the center of the differential. | 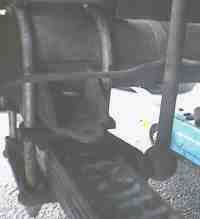 axle and u-bolts looking rearward |
 passenger side shock removal |
This is exactly how the whole assembly landed when it FELL off after un-bolting everything. The wood block under the axle is a secondary safety backup. The jack straps hold the axle, (plus it's sitting on the jack to relieve some of the load on the straps) but if the rear end fell it would only drop to the height of the blocks under the axle tubes. |
Since I am using 7/16" hardware, (the same diameter of the original upper shock body mount bolts), I had to ream out the shock mount points to 7/16". Buy yourself a good $8 high speed metal drill bit and expect to cook it like I did. The nice part about drilling these out it the great fit you'll get between bolt and shock. No squeaks or clunks from mismatched sizes. |
 |
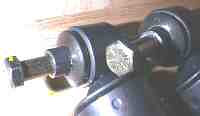 drilled shock ends - good bolt fit |
Here's a good view of just how smooth the drill out matched the bolts.Only a minimal amount of material had to be drilled out to clearance the 7/16" bolts. YMMV depending on which exact model shock you use. There are a few different models of mounts based on different vehicles this shock could fit.
|
The only problem I ran into during this whole episode was the bolts holding the dumbell into the lower mount plate. When I tried to loosen the nuts the bolt would just rotate inside the dumb bell. I tried Vise-grips, PBlaster (rust buster), and finally even drilled an 1/8" hole straight into the dumbell and on through into the bolt , none of it worked. The drill bit actually broke as if it had been cut off as the bolt twisted. So I cheated. I just drilled into the middle of bolt through the middle of the nut with the same drill bit I drilled out the shocks with. After a little wire brushing, and a coat of paint on the plate it was time to bolt on the new shocks. |
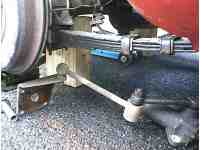
As seen from the driver side, the shock is a very simple and clean looking installation. I used
the front most mount hole of the original shock, to mount the new tube shock. This laid
the shock down the most. Travel length requirements are minimized this way. If I want them
stiffer I can always move them to the rear hole, making them more vertical and more
linear. |
 drivers side tube shock in place |
 muffler mount bolt clearance |
The drivers side lower mount was really close to the exhaust pipe. I had to move the the Peco 2" free flow pipe and muffler I have installed, over about 1/2" to 1" to eliminate any rubbing. ( I simply put my foot against the pipe and just pushed it over and it stayed.) |
because of my exhaust clearance problem on the drivers side, I simply put the bolt through the shock first and the nuts are under the leaf spring. |
 clearance - bolt reversed |
Well as an upgrade, it wasn't quite as dramatic as some make it seem it will be, but is was an improvement. I guess it depends on just how bad you old shock were. The most noticeable difference is in the cornering. It does feel as if the rear is a little more stiff in regards to body roll and placement. The rear doesn't seem as if it wants to break loose as easily or abruptly as before. (I haven't really pushed it that hard yet, we'll see.) Another point worth noting. Due to the gas charge in the shocks, the weight support afforded by these shocks, raised my rear ride height by about 1/4" to a 1/3" . Nice side bonus though.... It seems like I see more out my rear window :-) ! |
copyright![]() 1999
1999 ![]()
![]()
![]()
accesses