|
|
|
||||||||
|
|
|
||||||||
Whitey - A 1975 Spitfire 6 Cylinder and Fuel Injected Conversion |
||||||||||
|
||||||||||
|
||||||||||
|
||||||||||
|
||||||||||
|
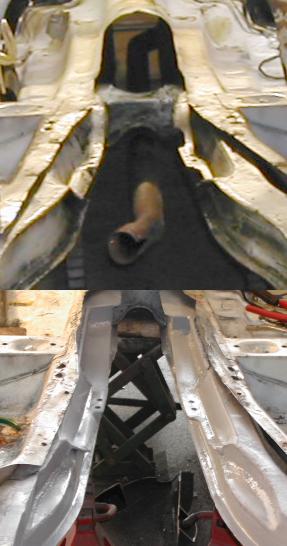
| Not many
pics were taken during the frame modifications. The engine and tranny
did go in and out of the vehicle at least three times to verify
positions of the mods needed. The areas cut out, were filled back
in with 1/8" thick stock. Surprisingly The stock frame metal is
only around 0.042" thick! That's roughly 19 gauge. Even
though it's no longer a 'box' in the modified areas, I don't think the
strength of the frame is compromised in any way shape or
form.
Cutting open this frame, also let me know
that Whitey's frame is still in fantastic shape. Not a sign of rust
anywhere. Oh... and just as a point of interest.... the
inside of your frame is painted black (weld through primer?). Apparently
the frame rail sub components are painted BEFORE the parts of the rails
are assembled to make the rails. A dissection of the welds (of the parts
cut out) show the paint between the sheets where they are pinch welded
to build the box of the rail. |
|
|
|
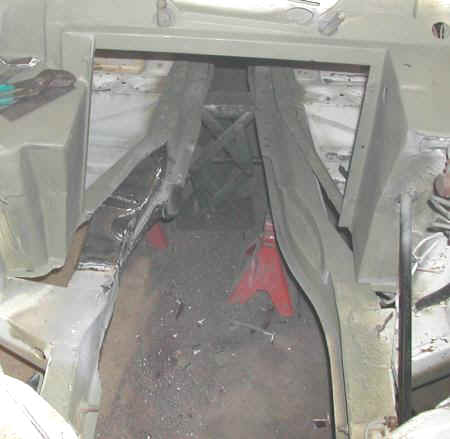
I didn't want to
have to pull the tub off. Doing so would have probably made the whole
job easier. But doing so would have required re-installing the whole tub
multiple times to check clearances. So I left it in place through all
this.
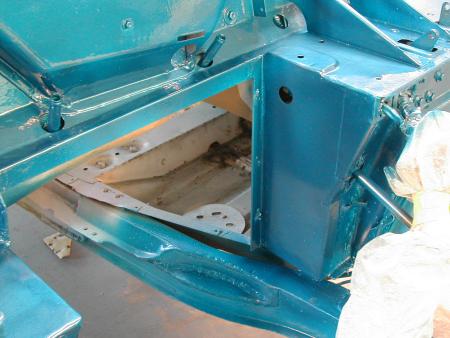
Moving the cross box (spans the frame rails just behind and below the rear tranny flange) was perhaps the biggest hassle. It was REALLY a pain trying to cut it out. So after countless angle grinder cut-off disks being trashed, a brand new Sawsall was purchased. What a COOOLLL tool! It made VERY simple work of ALL the frame mods. Inst4ead of just cutting on side of the frame box at a time, I was able to quite literally carve an 'orange wedge' out of the frame. (top side, and inner frame wall cut at one time) The front 'curves' clear the bell housing. The rear tranny mount area was reinforced on the inside walls with a slab of 1/8" x 2" stock. This formed the vertical wall that supports the flat area the tranny mount plate fastens to. AS usual, everything was kind of 'cut-to-fit'. A lot of test fitting, trimming and finally welding it in, then a lot of grinding to 'pretty it up'. A few holes need to be drilled, and the
center tunnel cross brace still needs |
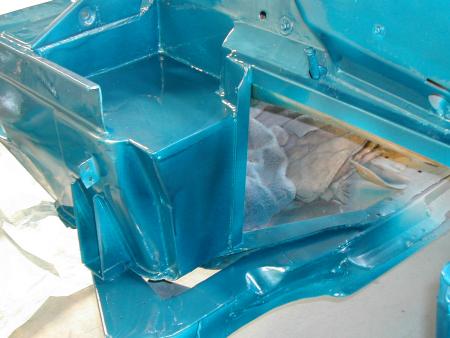
...updates post 4/1/2006...
|
Ok...back to updating these pages. After test fitting the engine and tranny again, I realized the exhaust system was not going to clear the frame rail. So I figured I'd simply go to a muffler shop and have them rebend the downpipe a bit. After a whole LOT of study...I realized that would be a no go as well as hte pipe would have to stcik out too far below the frame rail. My only other option...modify the frame rail...again! Having already eaten up a bit of space in the right side foot well to clear the starter with the new firewall, I figured out a simple fix. I cut out the now boxed in bottom front left corner of the right side floor pan, which gave me space to the right, of the right side frame rail. I simply cut out a chunk of 14 gauge steel, bent it into a 'C' 3" x3.5" x 3" (around the 'C' and) about 14" long. I then split the 'C' at the top and bottom and slightly folded it along it's length. This 'C' became the new right side wall of the frame rail. I then simply cut out the original left side of the right hand frame rail, to clear the pipe. So in simpler terms, I used the original right hand side of the right frame rail as the new inner (left side) of the frame rail and added a new outer right side to the rail.
|
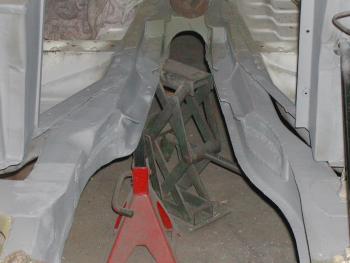
| Since the 14 gauge steel is heavier
than the original frame metal, I do honestly believe the frame is
actually stronger than before. Where the original rails were only about
3" wide, the rail mods here made the rail about 4" wide, even
after the exhaust clearance cut out. Also notice in the last shot, the
little 'divit' in the lft frame rail on the top inner edge. This was
doen before the exhaust clearance mods to clear the edge of the bell
housing. More so for bolt access so I can remove the tranny like normal
Spits, from inside the car. |
|
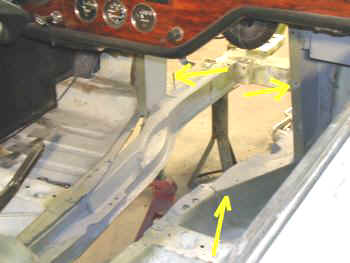 |
This shot is just for perspective. In the right side foot well you can see the new firewall section and how the floor was modifed to handle the starter starter overlapping the floor. This section was added to give the new fiberglass tunnel a place to bolt down to. |
|
|
|
|
|
|
![]()
©1987-2010
All material copyright© Teglerizer 1996-2008last edited
3/15/08

hits since last reset