|
|
|
||||||||
|
|
|
||||||||
Whitey's Carb Swap
Single Zenith Stromberg to Dual HS4 conversion
(all photos taken 7/ 2000 - 8/2000)
Whitey - 1975 Spitfire Specific Tasks and Procedures |
||||||
|
||||||
|
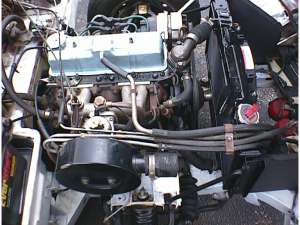
USA spec |
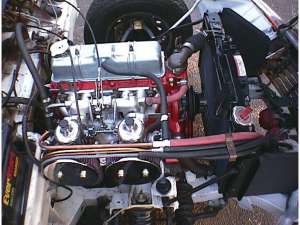
European Spec (minus emissions) |
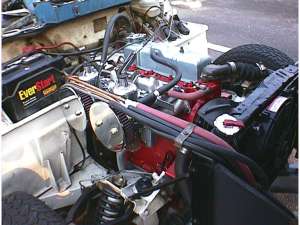
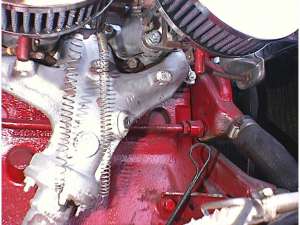
 These two photos (above and at the right) are good shots of how I routed all the breather pipes and emissions plumbing. Yep... even the anti-run-on valve is still functional in the dual HS4 installation. The fuel and crank breather pipes are copper, and brass was used for the the float bowl vents. The white plastic 'T' I.D. just happen to match the breather and vent line tubing O.D. Looking at the top two photos, you can see all the emissions hosing is almost in the identical positions,right down to the vacuum line that feeds the bottom of the carbon canisters mounted in front of the radiator. |
|
|
|
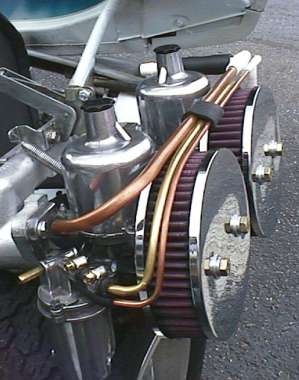
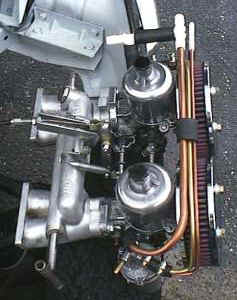
| The Dual HS4's are breathing through a pair of K&N filters, running stock European spec. ABT needles. The CO2 readings across the board are great! The exhaust pipe residue is a medium to dark brown (not black) I'm extremely happy with this setup.
|
|
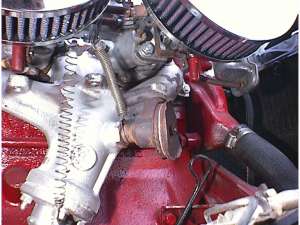 Had a big problem here. I didn't feel comfortable with how close the EGR valve was to the bottom of the front jet. (less than 1") The internal workings of the EGR valve were fused closed as were the threads into the exhaust manifold. So I busted out the trusty Dremel tool and sawed off the top half of the EGR valve to gain a little clearance. |
 Now it was just ugly, so I decided to cut the valve completely off the manifold (With the Dremel tool) After cutting it off, I filled the hole with a short, large diameter bolt covered in exhaust pipe sealer. I cross drilled the bolt, put a pin in it, and filled it with exhaust pipe repair putty as well. No leaks, and no signs of cracking. |
|
|
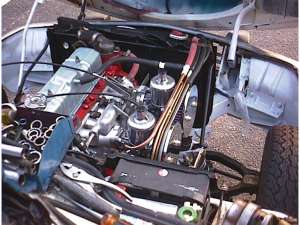
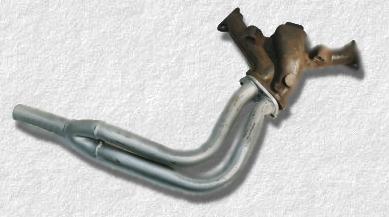
After all the work on the stock manifold to remove the EGR valve, I ended up swapping it out for a complete Euro-spec 4-2-1 system. (pictured here at left). Sorry. no pics on the car as of yet. But just like the carbs, this too was a very noticeable power increase over the stock setup. |
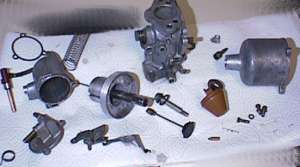  Stripping and cleaning HS4's is relatively easy. Just take you time and lay everything out so you can remember how it goes back together. The photo above right, shows what 20 minutes of polishing with a buffing wheel can do for the appearance of the carbs. Just do it while apart. (It's easier to get all the nooks and crannies cleaned and polished) |
|
©1987-2010
All material copyright© Teglerizer 1996-2008last edited
3/15/08

hits since last reset