|
|
|
||||||||
|
|
|
||||||||
(all photos taken July 2001 )
Whitey - 1975 Spitfire Specific Tasks and Procedures |
||||||
|
||||||
|
Man, I love EBay! Not only did I get a nice deal
on this hardtop... but the seller even delivered it!
The seller was going on vacation the day after the auction ended. At first I was bummed, thinking I'd have to wait until he returned from vacation to get my hardtop. Plus I wasn't looking forward to spending a small fortune to get it shipped. Well it just so happened he'd be quite literally driving past my house en route to his vacation destination. So less than 12 hours after having won the auction, from a guy in another state, I had my hardtop in my hands. ...Talk about a quick deal!
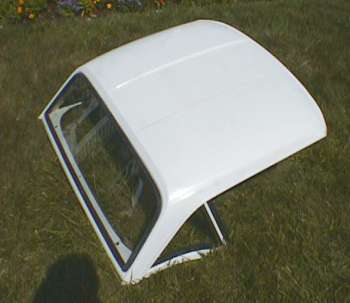
No...it didn't look like this when I bought it. It was shiny black with a just a few minor dings. The head liner needed a good cleaning after sitting around for 10+ years like it did. All the trim was intact but just needed a little gluing here and there to tighten up the visual appearance a bit.
So it was lightly sanded, and painted to match Whitey.
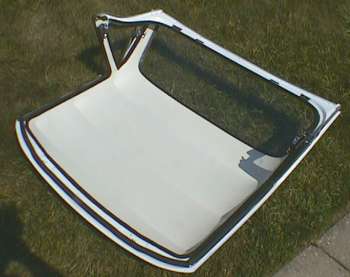
After removing all the trim, I scrubbed up the head liner just a bit, and re-sprayed it with off-white vinyl spray. It looks like it a brand new headliner. Interesting note: After the vinyl paint dried, it seems like it tightened up the headliner. Not too tight, just no floppy wrinkles anymore.Nice and taught
I can never leave well enough alone. So... out came the side windows while I had the trim out, so I could polish up all the stainless steel hardware. Yes, you have to drill out the rivets to get the windows out, but it made it a lot easier to buff the stainless steel. I used the exact same techniques I've used on all the carbs you'll find on other pages here. After some light gluing, all the original trim went back in.
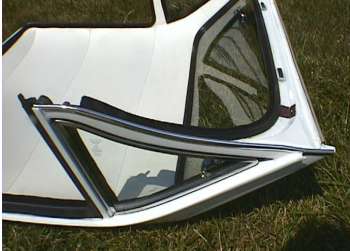
Just like the crossbars on the grill under the front bumper, I used that little 'C' shaped chrome door edge guard molding to trim the bottom edges of the top all the way around. In stock trim, the rear lower edge under the back window had a chrome trim strip, which this top was missing. So after running a piece of this edging along the back bottom edge, I figured ...why not. I ran it down the sides too. It'll help to protect the body paint when in place on the car.
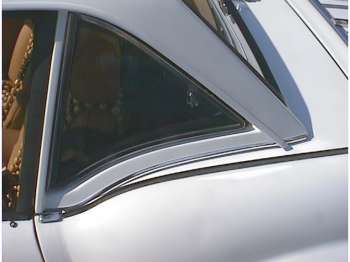
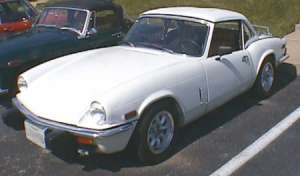
It's only sitting on the car here, not bolted on yet. It's still ragtop weather here for at least a few more months. I just wanted to check it for square. Personally I think it looks pretty good. I think it totally transforms the impression of the car. I still need a pair of the pads it sits on, under the rear edge where you bolt it down, and a pair of bolts for the windshield top. But all in all, ...not too bad for 5 hours work and less than the cost of a quality vinyl ragtop.
It's still missing the chrome trim around the back window glass. I have an original early Spitfire front windshield stainless steel chrome strip I think will fit here just fine. It'll take a bit of tooling, but that way it will match the front windshield real stainless steel trim.
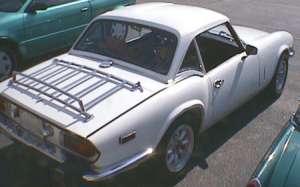
I'm including this shot just to show the new (to this Spit anyway) rear luggage rack. The original that was on the car when purchased, was for a Midget. Only four bars and a larger arch. This is a six bar proper Spitfire rack. Looks much better in proportion if you compare it to other photos of Whitey.
The smaller rack already found a new home with a fellow Spridgeteer. (Yes... that's Lil' Greenee just out of the photo at the lower right in the above photo). For that fact, it was at the Bowie, MD. BCD Show, where I saved him $100 when I told him I had one to sell. I believe it was headed for a Bugeye..or was it his wife's Midget??
The front of the hardtop mounts with two bolts through the upper windshield frame. The problem is the little spacers that are suppose to be there usually get lost (with age.. in storage) and are no longer available. You tighten them up without them, and end up denting the outside sheet metal as the bolt crushes the windshield frame while trying to get it sealed up properly.
I lost the ones to my 1980 spit back in 1981. I did luck out though, and found a set of spacers at a local hardware store. Now 21 years later, and another Spitfire, I needed a set of spacers. WOW! believe it or not, the same hardware store still had these same spacers on the shelf. They are bronze bushings, 1" long, and 5/16" diameter at the 'top hat' flange. These were found in those flat boxes of hardware you find in large hardware stores. They fit nearly perfectly. I mount them flange up, against the roof. No more fiddling with washers or worrying about crushing the frame or hitting the metal with the bolt ends. :-)
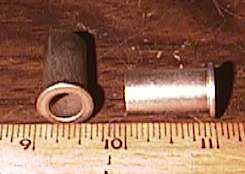
hardtop front mount spacers
.... now... where's that cooler driving weather...
![]()
©1987-2010
All material copyright© Teglerizer 1996-2008last edited
3/15/08

hits since last reset

