|
|
|
||||||||
|
|
|
||||||||
![]()
Whitey - 1975 Spitfire Specific Tasks and Procedures |
||||||
|
||||||
|
|
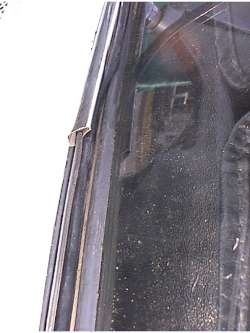
Excuse my lousy drawing, but this is the approximate cross sectional view of the windshield rubber gasket. The orange, is the chrome trim that is such a pain to install. Hopefully this page will give you a bit of insight and reveal a few tricks to getting the trim in. I was extremely happy to recently stumble on a set of REAL stainless steel trim pieces at a recent car show (Bowie, MD B.C.D. 2001). Although they'll never shrink like the commonly available plastic trim pieces, The lack of flexibility of the stainless steel, made them even more of a pain to install. The problem is trying to get the little lip of the windshield trim to stick up, and get it into the 'C' of the trim to snap it into place. |
|
||||||||||||
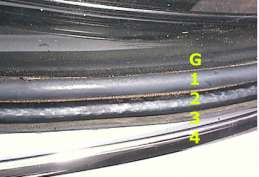
| My tricks, and the real reason to even bother typing up this page, were two fold. The first 'assistant' came about on my third attempt at getting it installed. I found a piece of cable TV coax cable was the right diameter to stuff down into the groove to lift up the flap and hold it in a workable position. | ||||||||||||
| I found starting in the middle of the vertical run up the side of the windshield worked best. Work first towards the upper corner. Then work in the top, then work the bottom corner than across the bottom. |
|
Just a shot of the coax
cable laying in the |
|
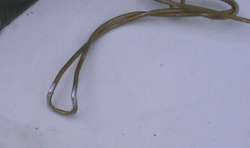
| THE 'tool'...the secret weapon. A chunk of coat hanger bent up to make a miniature crowbar. About a 1/2" wide at the foot, with the 'flip' being roughly the same. The handle, designed to choice. The real criteria of this is a 'blunt' edge to the tip of the crowbar. This shape will be stuffed under the trim, and the 'foot' used to shove the lip of the molding back and up under and into the groove in the C shaped trim molding. |
|
| A few times a screw driver had to be used as a wedge
to hold the molding up to get the crowbar (coat hanger) under the molding. Once you
get a section of the lip up into the groove from underneath, press against the molding
while pulling the coax wire out from under the molding. Give the molding a bit of a whack
with the heel of your hand and you'll almost hear it 'snap' into place.
|
![]()